Buckets
To upload data (i.e files like videos, photos, spreadsheets etc) to Amazon S3, a bucket needs to be created first. A bucket is an organizational structure similar to a drive or a mount point on an operating system in the sense that files and dicrectories/folders can be stored in them. It is important to note that the S3 bucket names are globally unique across all regions and all accounts on AWS and the name chosen for the buckets must be DNS compliant. This is because once the bucket is created it will have a global URL that is accessible through HTTP.
For example creating a bucket called haddad-cloud-bucket-1 in the EU (London) region will create a URL like this
https://s3.eu-west-2.amazonaws.com/haddad-cloud-bucket-1/
Creating Buckets
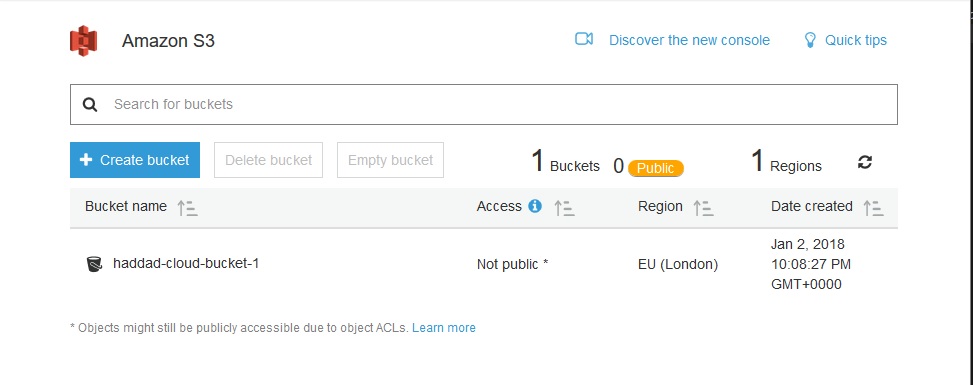
There are two ways of creating buckets and adding folders and objects (files) to them, using the Amazon S3 API and Using the AWS Console. In this article I will use the Console. When logged in the console where no buckets are created you will get an interface like this
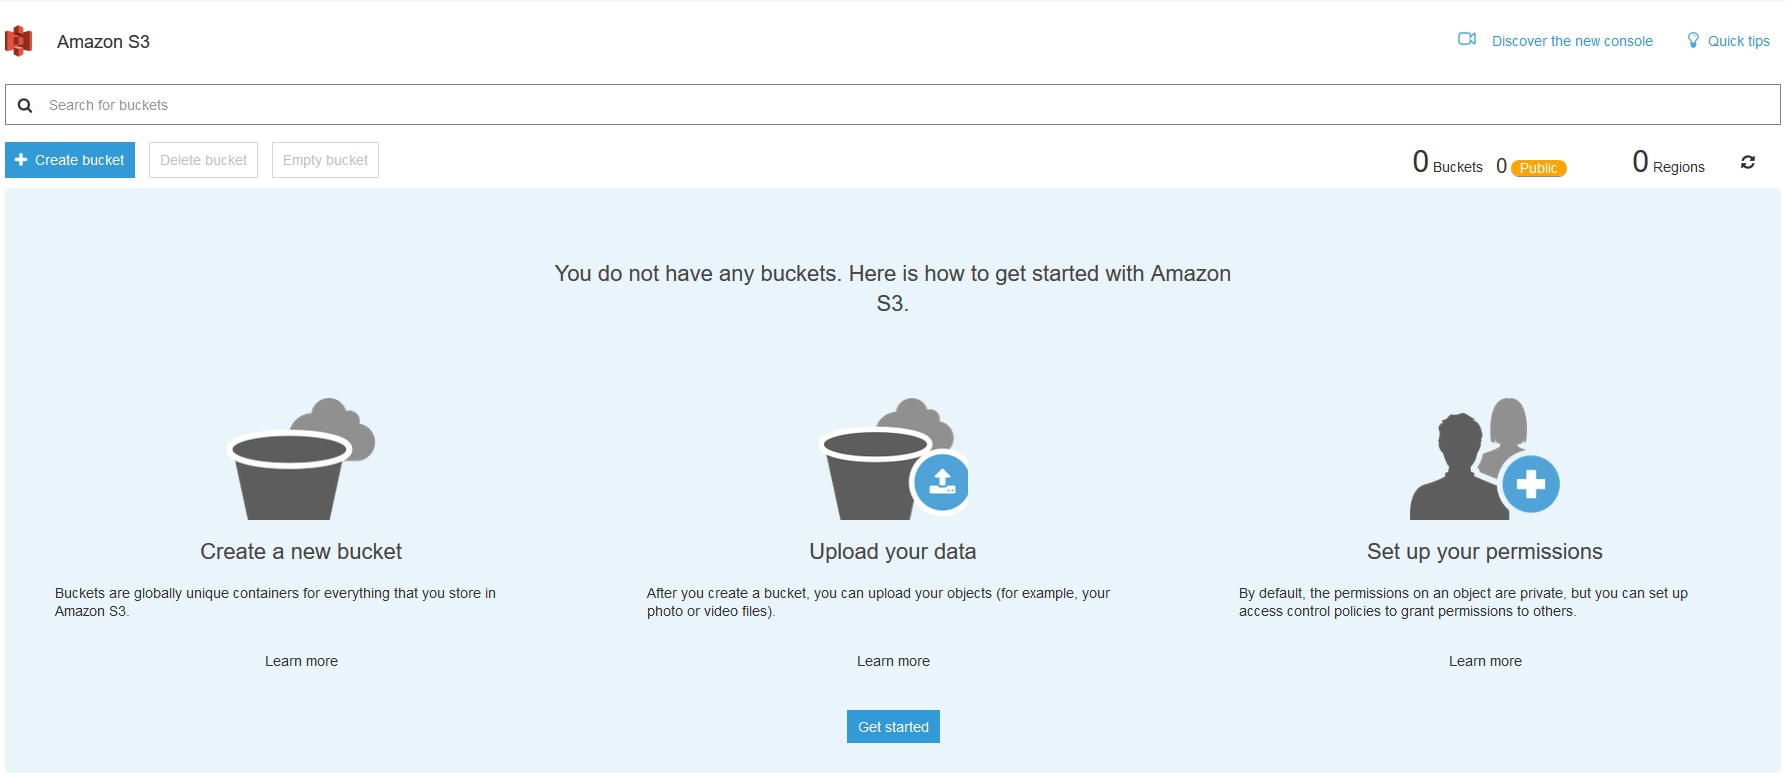
S3 Start Page
You can create a new bucket by clicking on the Create Bucket link that will launch a wizard, with the first screen requesting the bucket name (which must be unique on all regions) and the region where you want to create the bucket

Creating a New Bucket
In the next stage of the wizard you can set properties for the bucket, these include:
- Versioning
- Server access logging
- Tags
- Object level logging
- Default Encryption
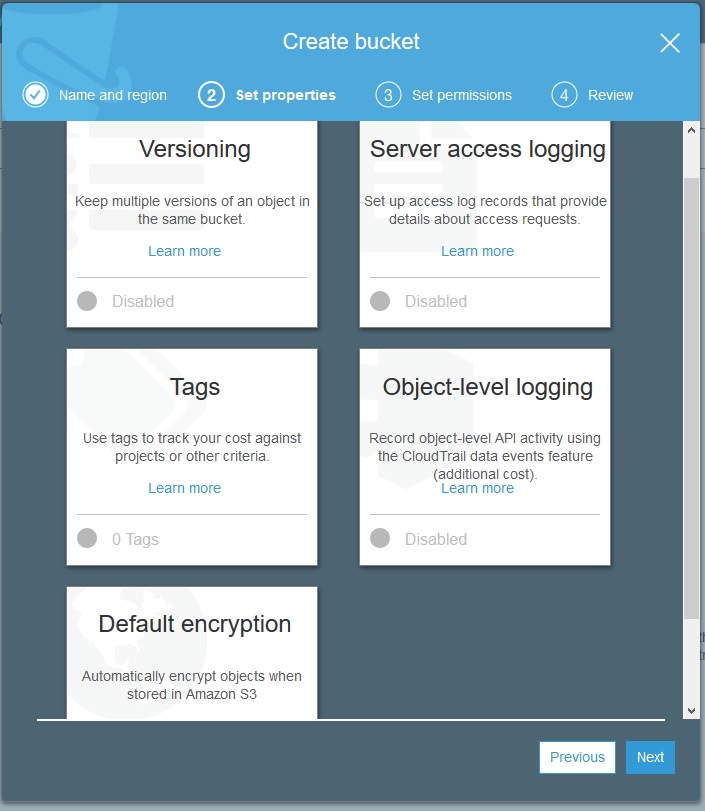
Creating a New Bucket
The next step of the wizard allows you to set permissions for the objects within the bucket.
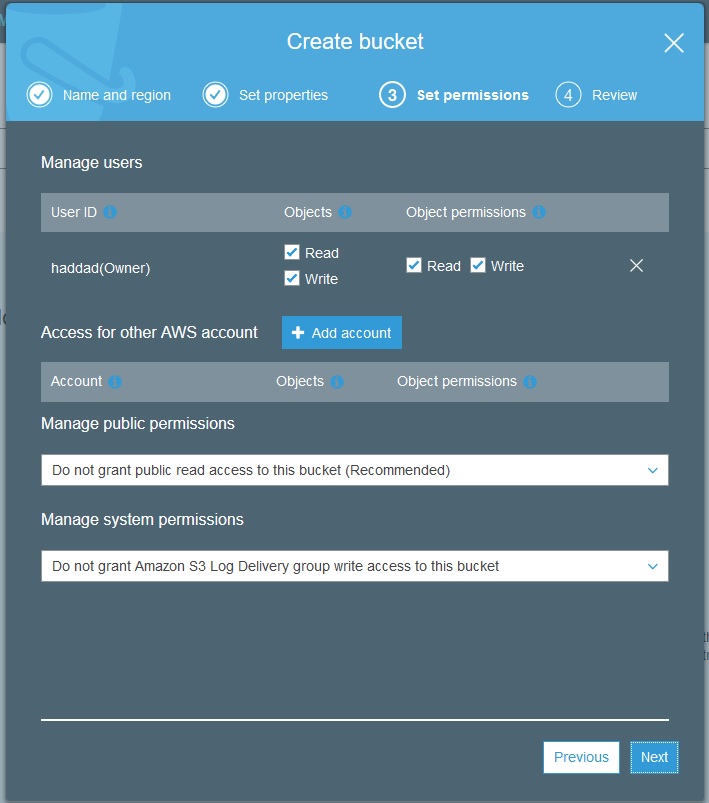
Creating a New Bucket
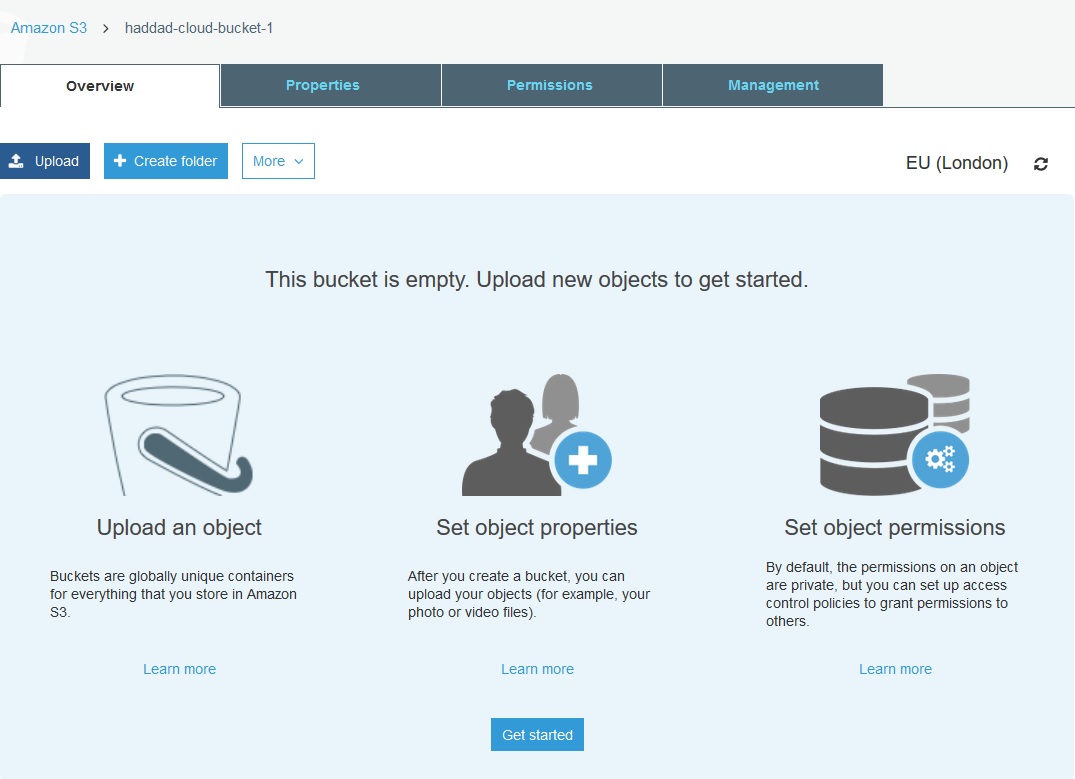
Once you have completed the wizard you will get a chance to review your options during the wizard and create the bucket. Once there is a bucket created the S3 home page would have an interface resembling this
S3 Home Page
Uploading Files
When you select your newly created bucket you would get an interface like this
S3 Bucket Overview Page
Where you can edit the properties and permissions of the bucket as well as create folder and upload files to the bucket. Uploading files can be done by clicking the Upload link which will start a wizard. The first step asks for file(s) to be uploaded from your computer
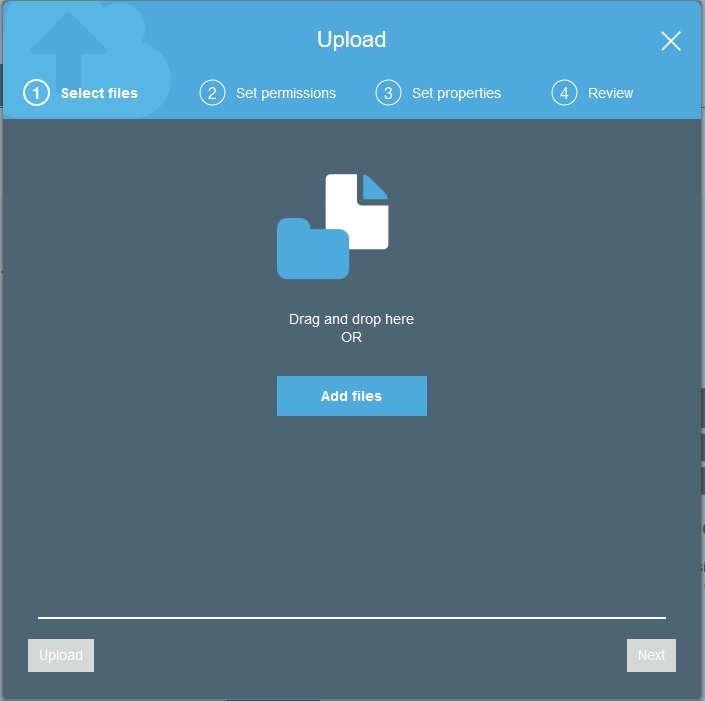
Uploading Files to a Bucket
Then you will be able to set permissions for the files(s) you are uploading, this provides another level of granularity for permissions over the permissions set at the bucket level
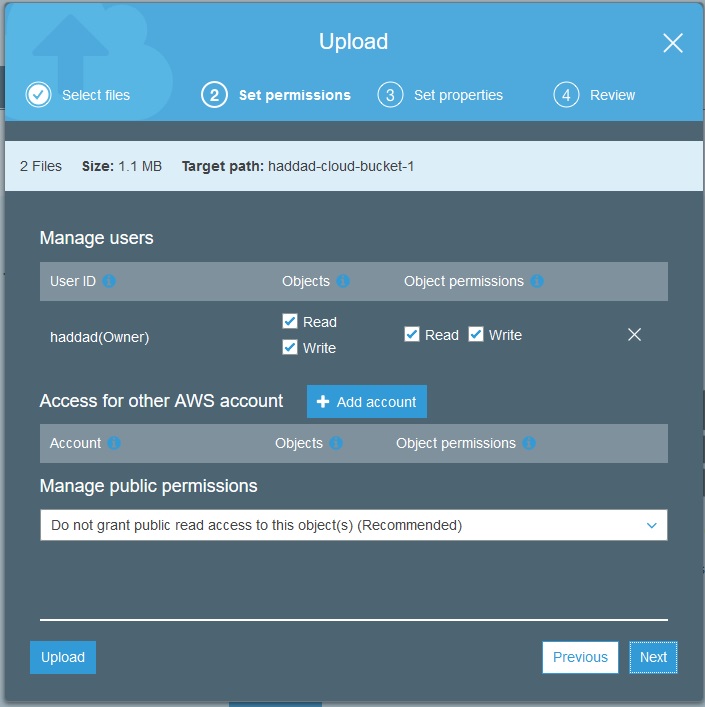
Uploading Files to a Bucket
The next step in the wizard allows you to set properties to the files(s) being uploaded, these include
- Storage class
- Depending on the needs you can choose from:
- Standard S3
- Standard Infrequently Accessed
- Reduced Redundancy
- Depending on the needs you can choose from:
- Encryption
- If you need server side encryption to protect your data you can choose from:
- Amazon S3 master key
- AWS KMS Master key
- If you need server side encryption to protect your data you can choose from:
- Metadata
- Tags
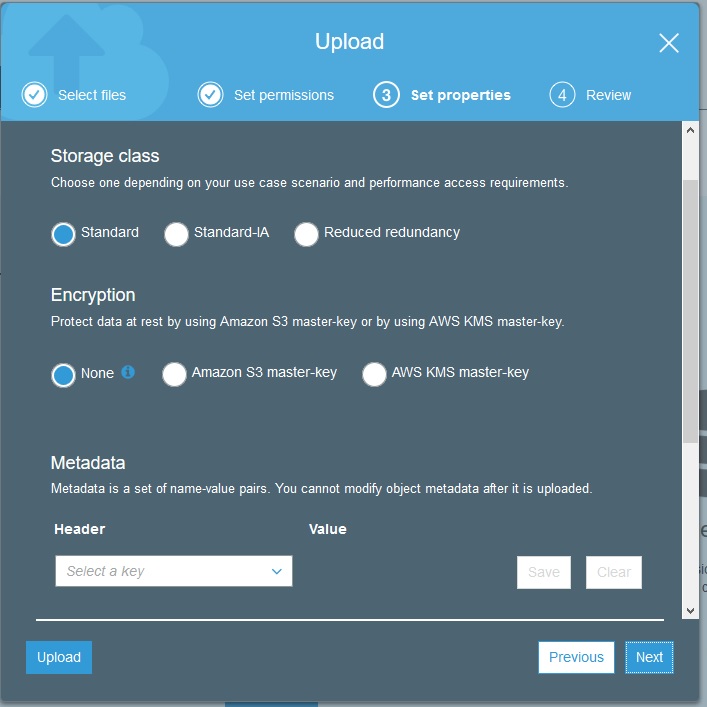
Uploading Files to a Bucket
Once you have completed the wizard you will get a chance to review your options and upload your file(s). Once uploaded the bucket hime page should resemble this
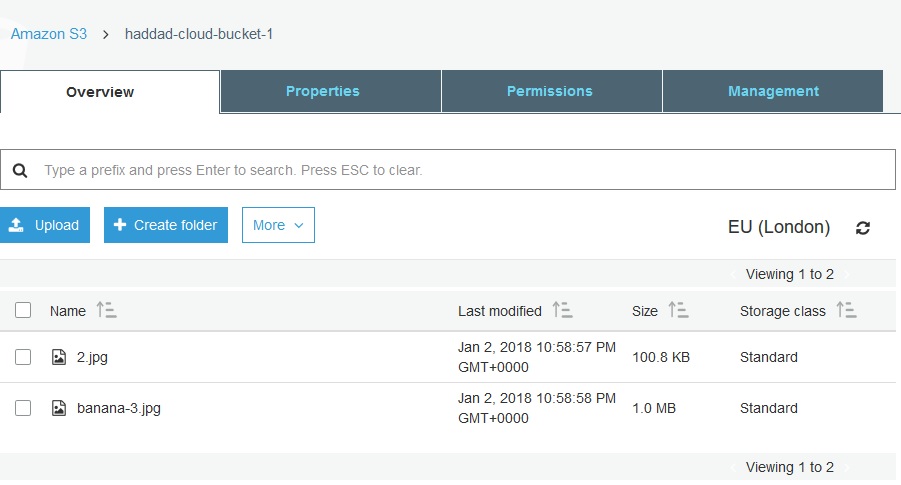
S3 Bucket Overview Page
When you select one file you will get a page with that file’s details
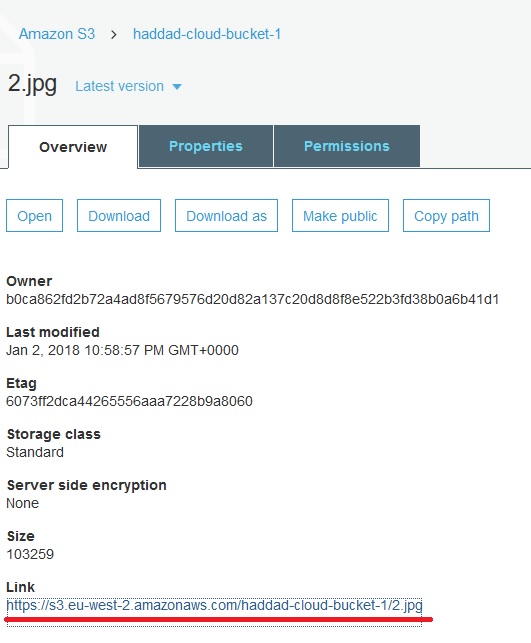
S3 Bucket File Overview
Public Access
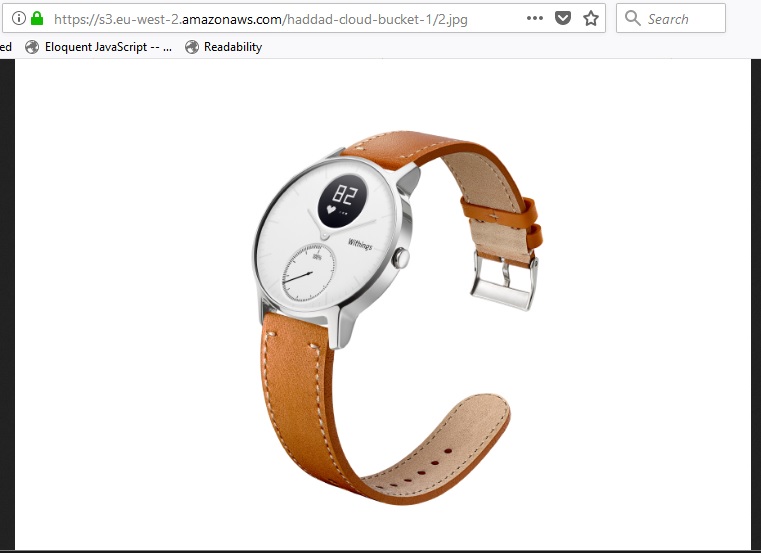
You can see in the screen capture above that the file’s URL is shown, this URL is accessible through the internet. However by default all files ploaded to S3 are not publicly accessible so if you click on that link you should get an error page like this
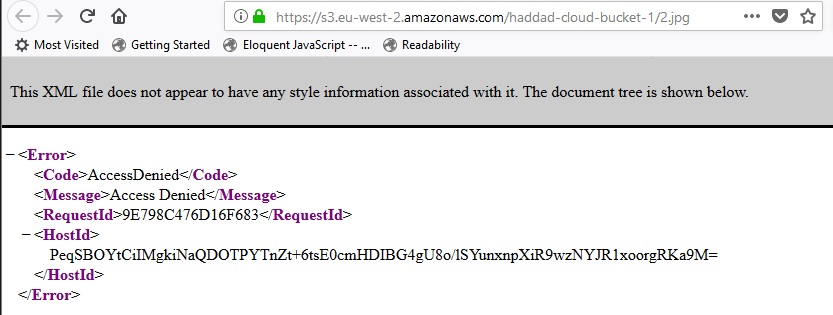
Access Denied
If you require your file to be publicly accessible there is a simplified method where you can just click on the Make Public link on the file’s details page on the AWS console
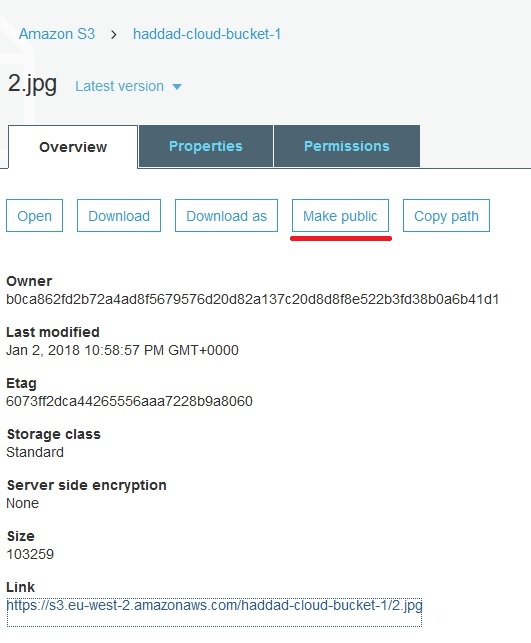
Make File Publicly Accessible
When you do that the file can now be accessed publicly through it’s unique URL (this is why S3 required bucket names to be globally unique and DNS compliant)